Quick Start
Table of contents
- Introduction
- Installation
- What we will do
- Setting up the scene
- Creating actions
- Binding the actions to input
- Using the actions in code
Introduction
This is a quick start guide to get you up and running with G.U.I.D.E. within a few minutes. We assume that you have a basic understanding of Godot, e.g. how to use the editor and create basic stuff like scenes and sprites. If you are new to Godot, you probably don’t want to use G.U.I.D.E just yet, and we recommend to first get acquainted with the engine.
Installation
First, you need to install G.U.I.D.E. Check out the installation instructions on how to do that and then come back here.
What we will do
In this quick start guide we’ll do a very simple example of controlling a player with the commong WSAD keys. This will move the player up, down, left and right. We’ll also add an action that makes the player say “Hi” which is triggered by the Space key. You can find the finished version of this example in the quick_start folder of the guide_examples folder that comes with the plugin.
Setting up the scene
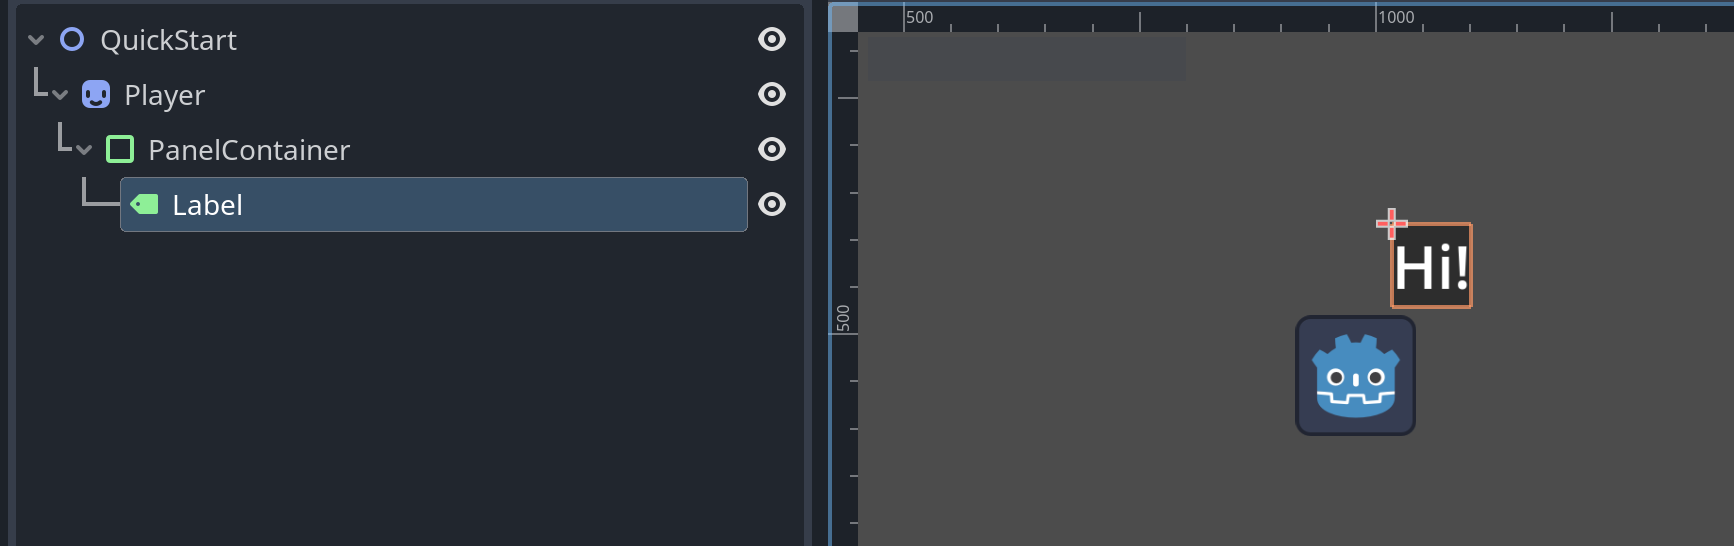
We’ll need a scene where we have a player that can move around. So first let’s create a new 2D scene. As a player we’ll just use a simple sprite and we’ll add a label in a panel container to display the “Hi” message.
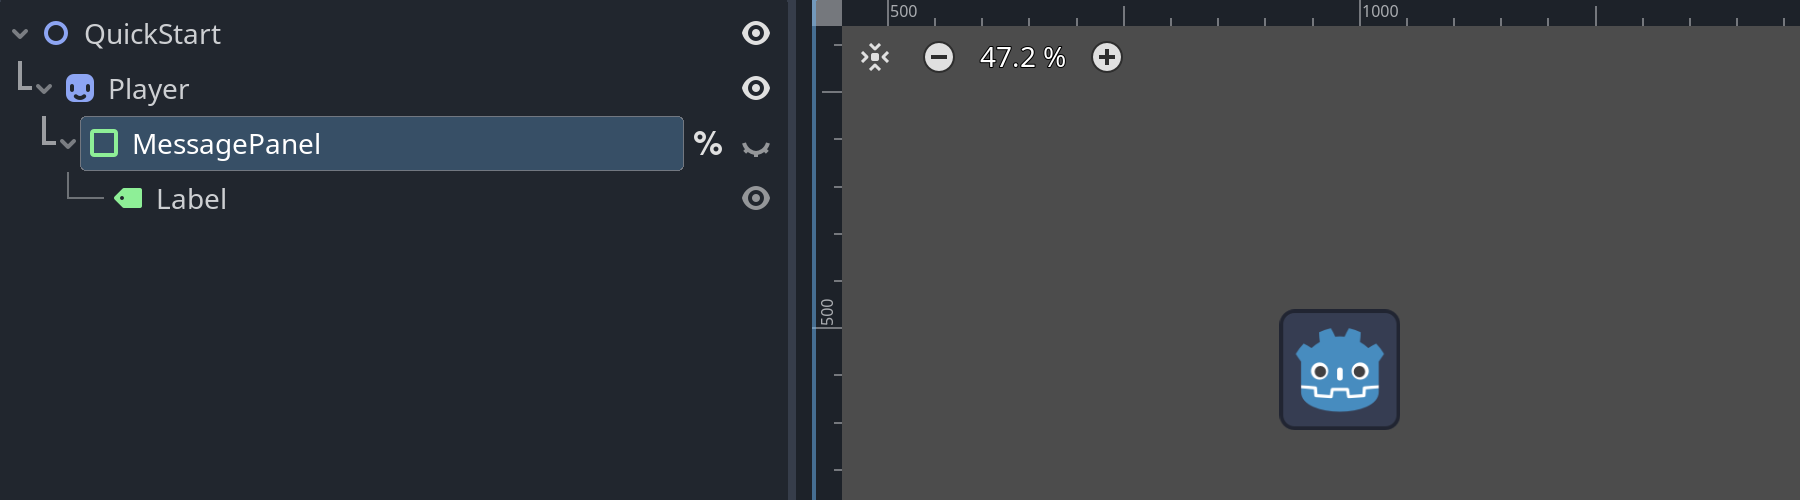
We’ll rename the panel container to MessagePanel, hide it by default and also assign it a scene unique name to make it easier to find in the script later.
Creating actions
G.U.I.D.E is all about actions, so let’s create the actions that we’ll need. Our player should be able to do two things: Move around and say “Hi”. So we’ll create two actions: move and say_hi. G.U.I.D.E. actions are Godot resources, so we create them like any other resource in Godot - right-click in the file system dock and select Create New and then Resource…. Now a dialog will pop up and we can search for GUIDEAction to create a new G.U.I.D.E action. We name this action move.tres and save it somewhere in our project. We can now duplicate this action with Ctrl+D and rename the duplicate to say_hi.tres.
Setting up the actions
Actions in G.U.I.D.E have a few things that can be set up. The most important thing is the action’s value type. This determines what kind of data we can receive from the action. Our move action will be a 2-dimensional axis because it contains horizontal and vertical movement. The say_hi action will be a simple button press, so its value type will be a boolean. We can set this up in the inspector of the action. So let’s double-click on the move.tres action to open it in the inspector. There we have a property named Action value type that we can set to Axis 2d:
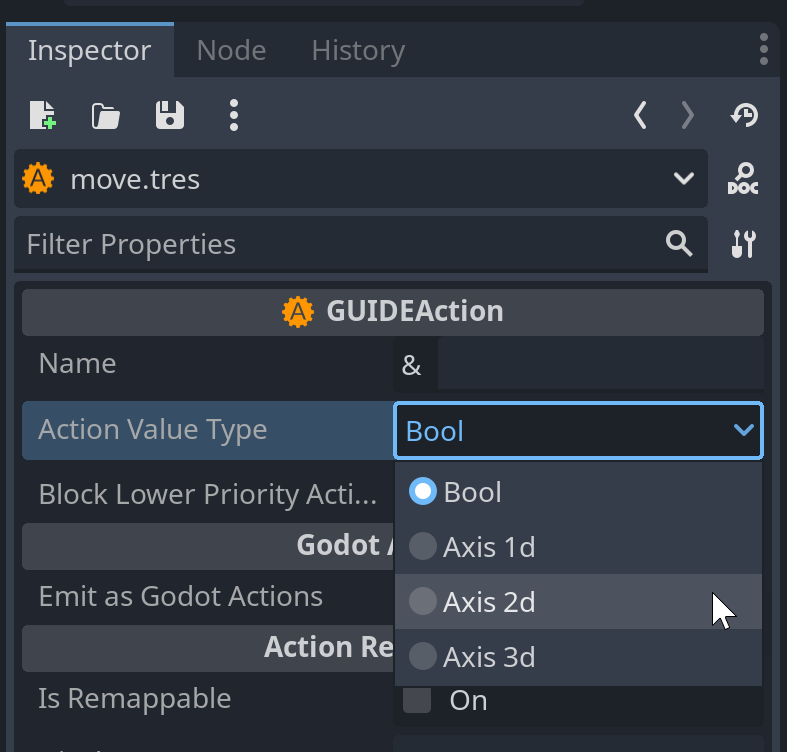
For the say_hi action we don’t need to change anything, as the default value type is already Bool. We also can ignore all the other settings right now because we don’t need them for this example.
Binding the actions to input
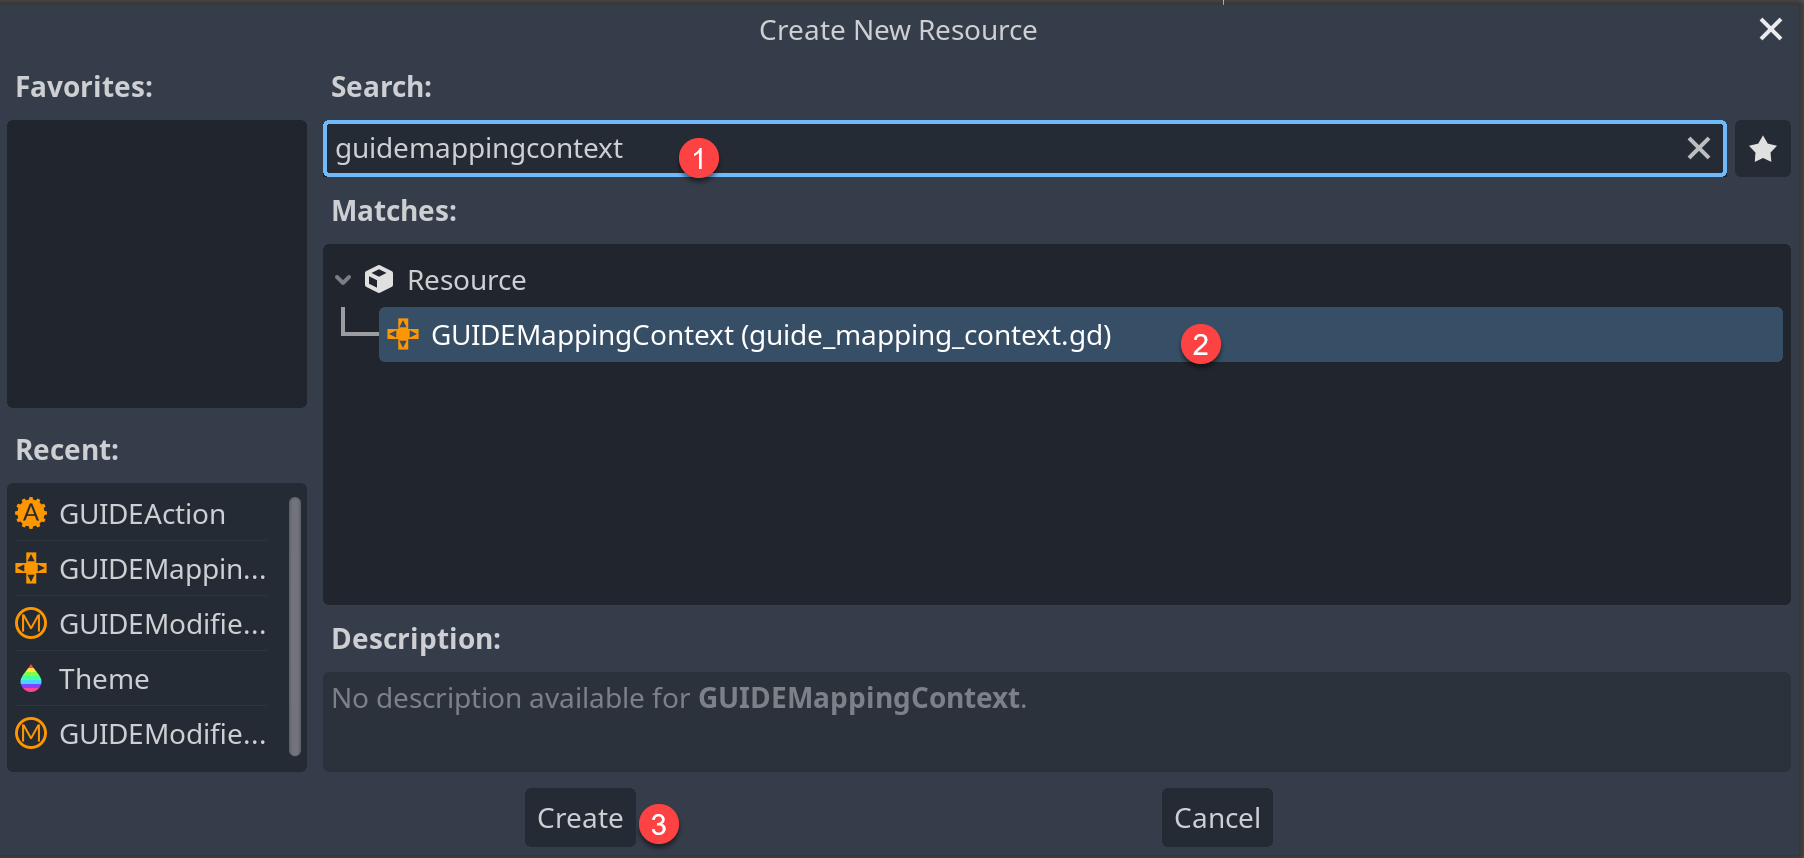
Now that we have our actions, we need to bind them to input events. In G.U.I.D.E this is done with a Mapping Context. A mapping context is a collection of bindings that map input events to actions. Like an action, a mapping context is a Godot resource, so we can create a new mapping context by right-clicking in the file system dock and selecting Create New and then Resource… and select GUIDEMappingContext in the dialog that pops up. We name this mapping context quickstart.tres:
Now we can double-click quickstart.tres to edit this mapping context. G.U.I.D.E provides a customized editor for setting up the mapping context, so instead of the usual inspector, the editor will open in the G.U.I.D.E tab of the editor.
We now see an empty mapping context. We can add a new action mapping to it by clicking the + button. This will add a new row to the mapping context where we can set up the mapping. First we need the action that we want to create a mapping for. We can just drag this into our mapping context from the file system dock.
Now we can create input mappings for our action. Our action should be driven by four keys - W, S, A and D. So let’s add 4 input mappings to our action mapping by pressing the + button in the Input Mappings section. We get 4 rows, and in each we can click the edit button to bind input. A popup will open and ask us which kind of input we want to bind. We want to do a key press, which is a boolean input. So we select Boolean. Now the dialog tells us to actuate the input we want to use. We start with W so we press the W key. If we’re happy, we press the Accept key and the input will be added to our action mapping. We repeat this for the other keys.
Getting directional input
So far we only have bound the keys to the action, but right now we haven’t set up how each key affects the action. We want the W key to move the player up, the S key to move the player down and the A and D keys to move the player left and right. With Godot’s input system we would have created 4 actions for each direction and then have used Input.get_vector("left", "right", "up", "down") to get the direction. In G.U.I.D.E we can set this up directly in the action mapping so our code doesn’t need to care about this.
All input in G.U.I.D.E is represented as a Vector3. This is because G.U.I.D.E is designed to work with all kinds of input devices, and a Vector3 can represent all of them. For our simple example we only need the x and y components of the Vector3.
When we press a key on the keyboard, G.U.I.D.E will write a 1 into the x component of the input vector. When we release the key, G.U.I.D.E will write a 0 into the x component. So right now if we press any of the 4 keys, we would always get an input vector of (1, 0, 0). We can now use modifiers to change how the input is processed. Let’s start with the W key. This should be the up key. In Godot the up direction is negative y so we need to negate that input value and move it into the y component. We can do this with modifiers. To negate the value, we can use the Negate modifier and to move the input into another component, we use the Input swizzle modifier. By default the Input swizzle modifier will swap the x and y coordinates of our input so we don’t need to do any additional configuration.
Now we can set up the S key which is positive y, so for this we only need an Input swizzle modifier. The A key is negative x, so we add a Negate modifier and the D key is positive x, so we don’t need any modifiers for this.
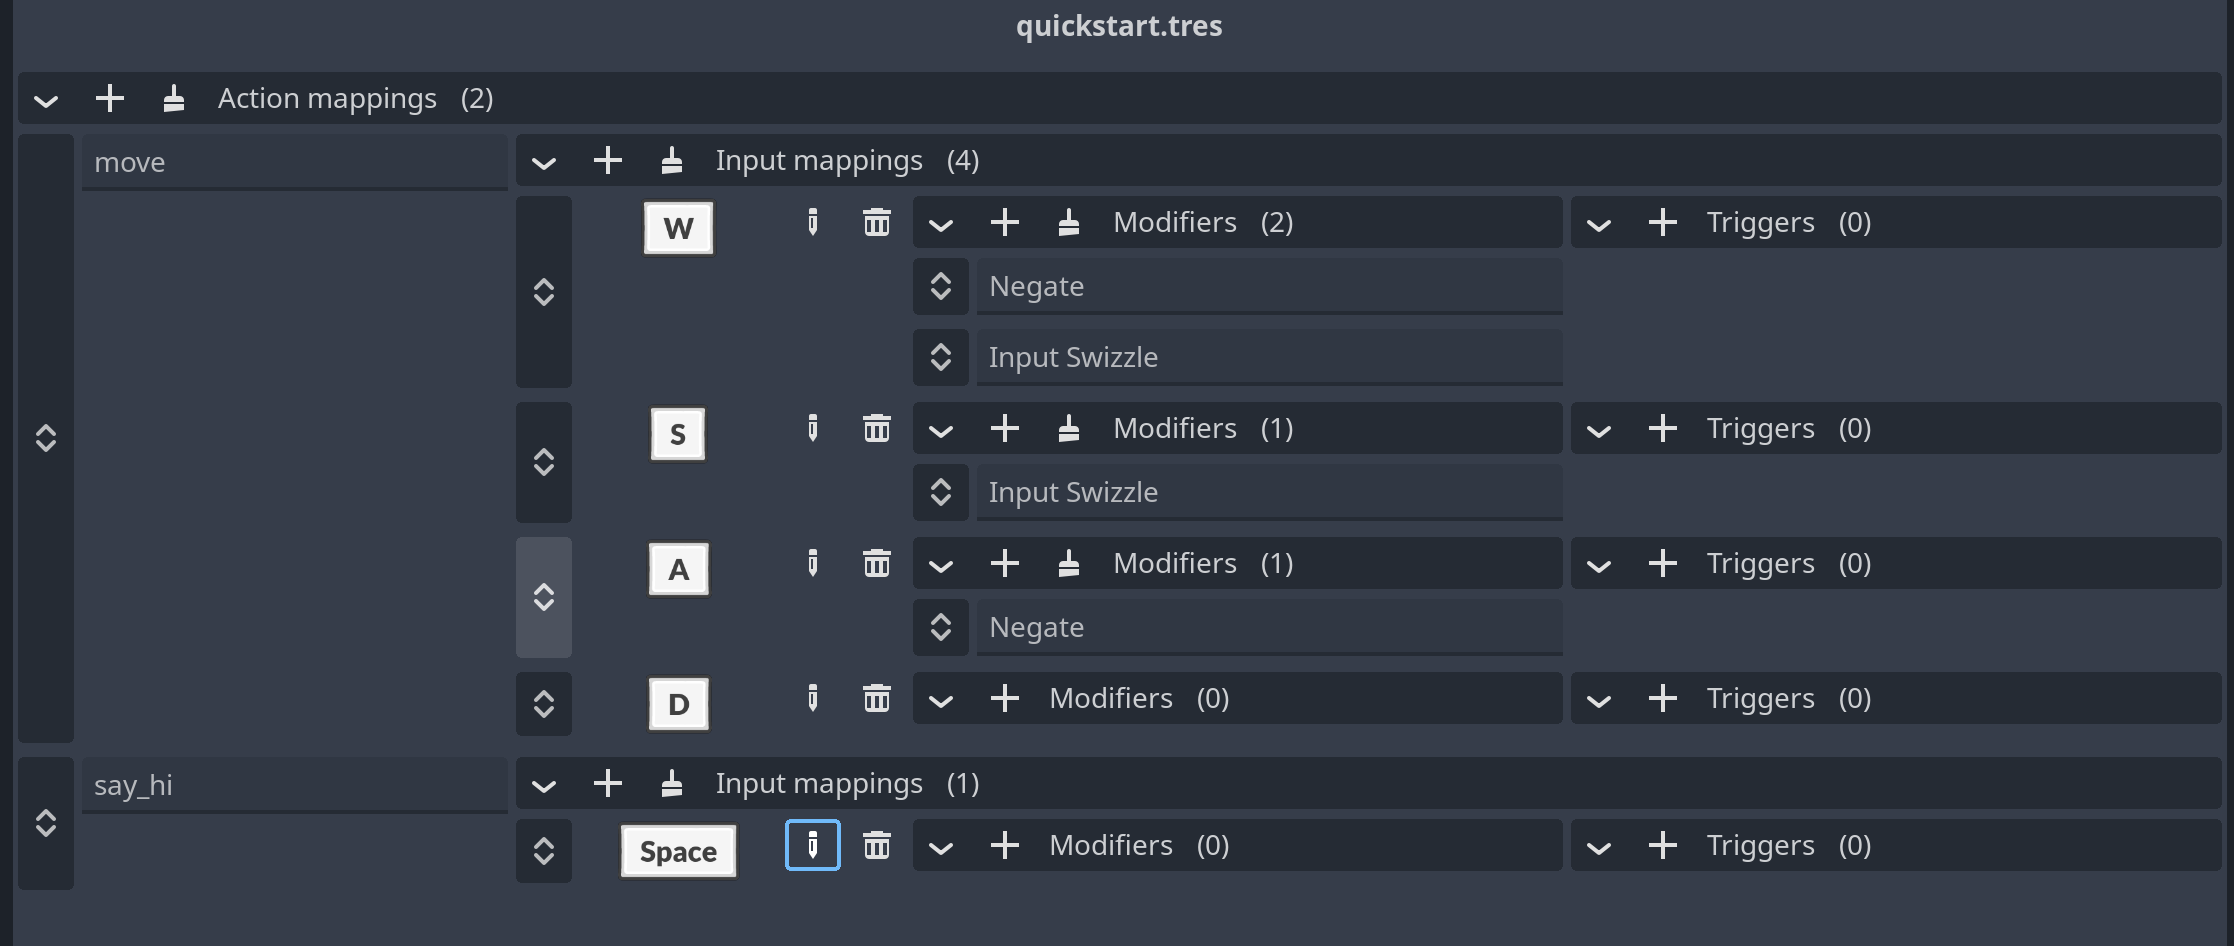
That’s it for the movement. Now we can set up the say_hi action. This is a simple button press, so we don’t need any modifiers for this. We can just bind the Space key to the action. This works the same way as binding the WASD keys, so at the end our mapping context should look like this:
Controlling the action with triggers
Now our say_hi action works a little bit different than the move action. The move keys will be continuously pressed and as long as they are pressed the player will move. The say_hi action should only be triggered once when the Space key is pressed but not repeatedly while the key is held down. So we need to add a custom trigger to our say_hi action. We can do this in the Triggers section, and for this one we add a Pressed trigger. This trigger will only trigger the action once when the input is pressed and then not trigger it again until the input is released and pressed again. This is similar to what Godot would do with the Input.is_action_just_pressed function.
Using the actions in code
Now that we have set up the mapping context, we can actually start using these actions in our code. Let’s first create a script for the player. We call it player.gd and attach it to the player node:
extends Sprite2D

## The speed at which the player moves.
@export var speed:float = 300
## The action that moves the player.
@export var move_action:GUIDEAction

func _process(delta:float):
    # Get the input value from the action and move the player.
    position += move_action.value_axis_2d * speed * delta
We see that we have a new property move_action that is of type GUIDEAction. In contrast to Godot’s built-in input system, actions are resources, and we can inject them into our script like any other resource. This has a few benefits:
- We don’t use strings to refer to the action, so we can’t make typos.
- We can right-click on an action in the file system and can quickly find where it is used by selecting View owners.
- We can easily use a different action on the existing script. For example if we have local multiplayer, we can use the same script to control two player instances, each using a different action for player 1 and 2.
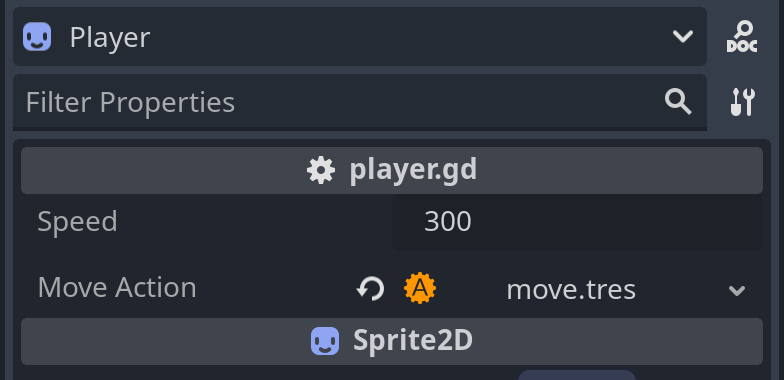
To inject the action into the script, we can just drag the move.tres action from the file system dock into the move_action property in the inspector.
Now in the _process function we can get the value of the action by calling move_action.value_axis_2d. This will return a Vector2 with the current input value of the action. This is automatically calculated by adding up all the input values that are bound to the action and applying the modifiers to them. So we don’t need to care about how the input is processed, we just get the final value. This also has a few benefits:
- We can easily bind this action to different input events. If we wanted to use the mouse or a joystick to move the player, we could just bind the mouse movement or a 2D joystick axis to the
moveaction and the script wouldn’t need to change. - Things like deadzones or input inversion (e.g. reverse up/down, left/right) can be set up in the mapping context and don’t need to be handled in the script.
If we now start the game, nothing will happen though. This is because we haven’t enabled the mapping context yet. The mapping context is usually not enabled in the player script because that is something that is done at the start of the game. So we’ll also add a script to the root of our scene which we name game.gd:
extends Node2D

## The mapping context that we use
@export var mapping_context:GUIDEMappingContext

func _ready():
    GUIDE.enable_mapping_context(mapping_context)
This is a very simple script that just enables the mapping context using the GUIDE autoload that is automatically enabled once we install G.U.I.D.E into our project. Like with our action, the mapping context is a resource, so we make an @export for it. We can now drag the quickstart.tres mapping context into the mapping_context property in the inspector.

Now if we start the game, we can move the player around with the WASD keys:
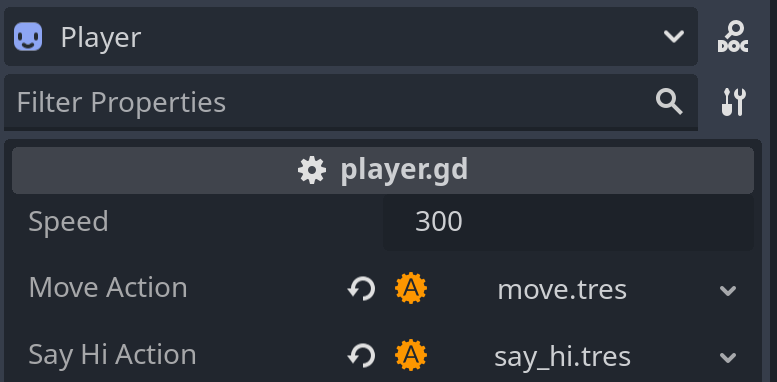
Now all that is left is to add the say_hi action to the player. We also inject this action into the player script and then drag it into the inspector:
## The action that says hi.
@export var say_hi_action:GUIDEAction
Now because the say_hi action is a button press we don’t need to check it every frame in our _process function. Instead we can use the triggered signal that is emitted by the action when it is triggered. We can connect this signal to a function that will show the message panel when the action is triggered:
func _ready():
    # Call the `say_hi` function whenever the say_hi_action is triggered.
    say_hi_action.triggered.connect(_say_hi)


func _say_hi():
    # Quickly show and hide message panel
    %MessagePanel.visible = true
    await get_tree().create_timer(0.5).timeout
    %MessagePanel.visible = false
Now if we start the game, we can move the player around with the WASD keys and when we press the Space key, the player will say “Hi”:
That’s it! You have now set up G.U.I.D.E in your project and created a simple example that uses actions to control a player. Check the guide_examples folder that comes with the plugin for more examples and ideas on how to use G.U.I.D.E in your project.